Adobe Lightroom is among the most powerful and reliable photo editing tools available today. A long-time favorite of photographers, it continues to evolve year after year, introducing new features that make editing both faster and more efficient.
Like other Adobe applications, Lightroom has embraced AI-powered tools, giving creators smarter ways to enhance their images with minimal effort. On top of that, its batch editing and custom preset options allow photographers and content creators to maintain consistency across large sets of photos while saving valuable time. Let’s explore how these features can transform your workflow.
Batch Photo Editing Made Easy with Adobe Lightroom
Batch Editing is a powerful Lightroom feature that allows you to edit multiple photos at once instead of adjusting them individually. This method is especially useful when working with a series of similar shots or images that need the same corrections—such as exposure adjustments, color grading, or contrast enhancements. By applying edits across a group of photos in one step, you can save time while maintaining a consistent look throughout your collection.
One of the simplest ways to apply batch editing in Lightroom is by using presets. These include a set of predefined adjustments (such as exposure, saturation, contrast, lighting, and more) that you can instantly apply to multiple photos at once—without having to edit each one individually.
Another practical option is to copy and paste edits from one adjusted photo and apply them directly to other images in your collection.
Steps to do this:
- Once you’ve finished editing a photo with the desired adjustments in Adobe Lightroom, simply select it and copy the edit settings. To do this, click on Copy Settings (you’ll find the option at the bottom of the Lightroom panel).
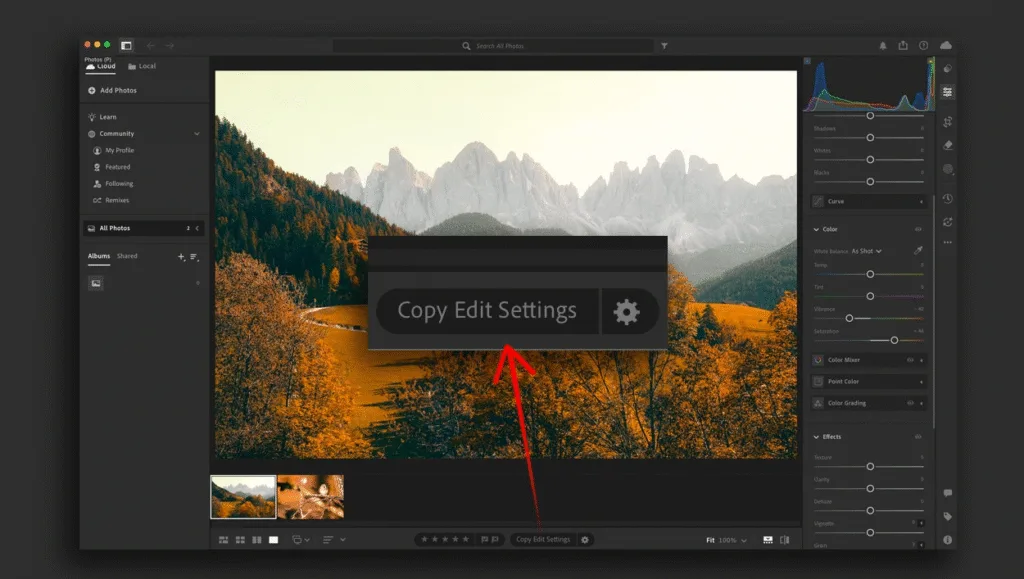
- Next, go to another photo in your library, select it, and click on Paste Settings. This will instantly apply the same edits from your first photo to the new one.
- If you only want to copy certain adjustments instead of all edits, use the shortcut Command + Shift + C (macOS) or Ctrl + Shift + C (Windows). This will open a panel where you can select the specific settings—such as exposure, color grading, or contrast—that you want to apply to another photo.
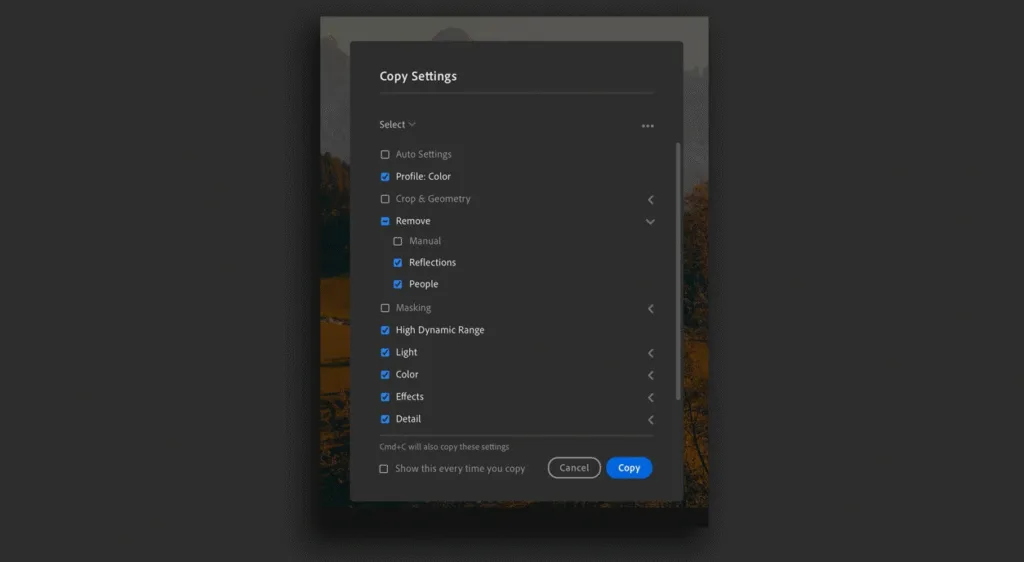
If you’d like to apply adjustments to a group of photos as soon as you import them into Lightroom, you can set this up through the preferences menu.
- On macOS: go to Lightroom > Preferences > Import
- On Windows: go to Edit > Preferences > Import
From there, look for the RAW Defaults option and change it to the setting of your choice. You can select either a preset you’ve already created or one of Lightroom’s built-in presets, ensuring that your photos are automatically edited upon import.
How to Create Your Own Presets in Adobe Lightroom
Earlier, we mentioned that Lightroom allows you to create your own custom presets. If you’re unsure how to get started, just follow these steps:
- Edit a photo to your liking by adjusting settings such as color, exposure, contrast, and lighting.
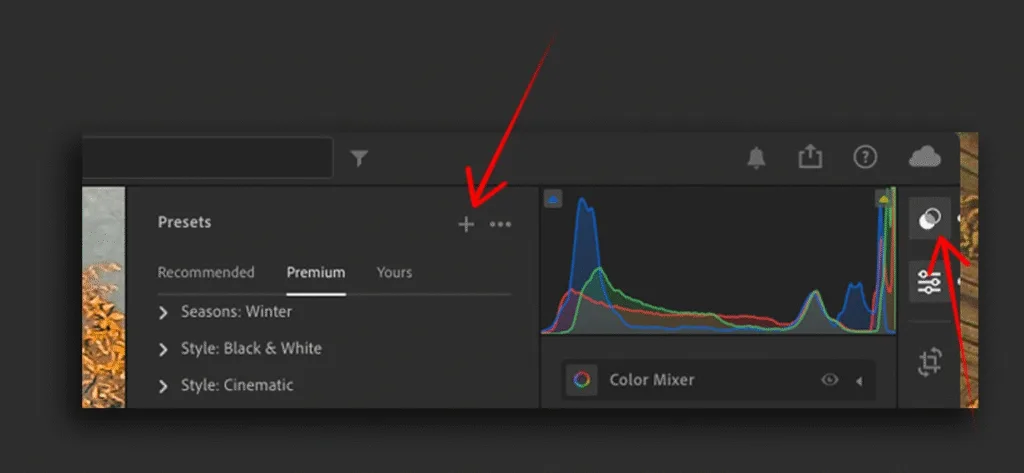
- Once you’re satisfied, go to the panel on the right and click on the Presets tab. Then, click the “+” button.
- A new window will appear where you can choose which settings (exposure, color grading, tone, etc.) to include in your preset.
- At the top of the window, enter a name for your new preset, then save it.
Your custom preset will now be available for future use, allowing you to apply the same style or adjustments to any photo with a single click.
AI-Powered Photo Editing: How Lightroom Makes It Simple
As mentioned earlier, Adobe Lightroom leverages artificial intelligence to make photo editing faster and more precise. Features like Denoise, Masking, and Generative Remove use AI to deliver impressive results with minimal effort.
How to Use AI Editing in Lightroom:
- Open your photo in Adobe Lightroom and apply one of the AI-powered editing tools available in the program.
- Once applied, the AI Edit Status will activate. The button will be highlighted in yellow, indicating that you should review and adjust certain settings to ensure the edits are effective.
- After making any necessary adjustments, click Update All within the AI Edit Status panel. Here, you can also review a detailed breakdown of all the AI edits applied to your photo.
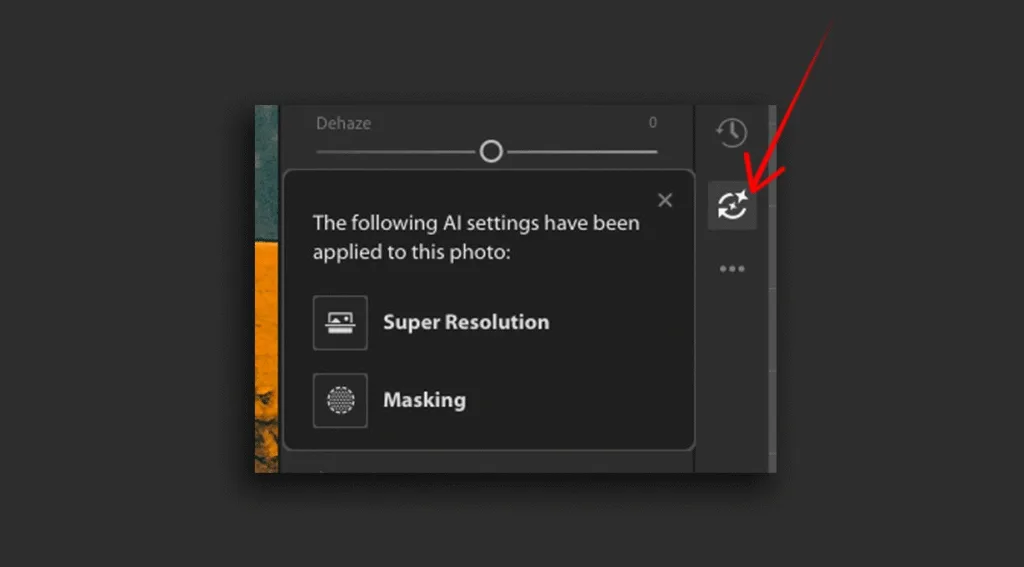
Some of the most powerful AI-driven effects in Lightroom that can significantly enhance your images are Denoise, RAW Details, and Super Resolution.
Super Resolution: Doubles the linear resolution of your images, which is especially useful for enlarging cropped or small photos without losing quality.
Denoise: Reduces noise in your photos while preserving fine details, making low-light or high-ISO images look cleaner and sharper.
RAW Details: Enhances sharpness, improves color reproduction, and brings out subtle textures, giving your photos a more polished and professional look.
Adobe itself recommends a specific order for applying AI-powered effects and edits in Lightroom to achieve the best results. Following this sequence ensures that each adjustment works optimally with the others:
- HDR
- Denoise, RAW Details, Super Resolution
- Reflections Removal
- Distracting People Removal
- Generative Expand
- Generative Remove, Content-Aware Remove, Heal, and Clone
- Lens Blur
- Lens Profile
- Crop and Transform
- Adaptive Profiles
- Global Adjustments
- Masking
