
Install Windows 11 on Unsupported PC:
Has Microsoft left your perfectly capable PC behind? You are not alone. In 2026, Windows 11 has become the standard for gaming, productivity, and security. However, millions of users are still stuck on Windows 10 simply because their hardware doesn’t meet Microsoft’s strict – and honestly, somewhat arbitrary – requirements.
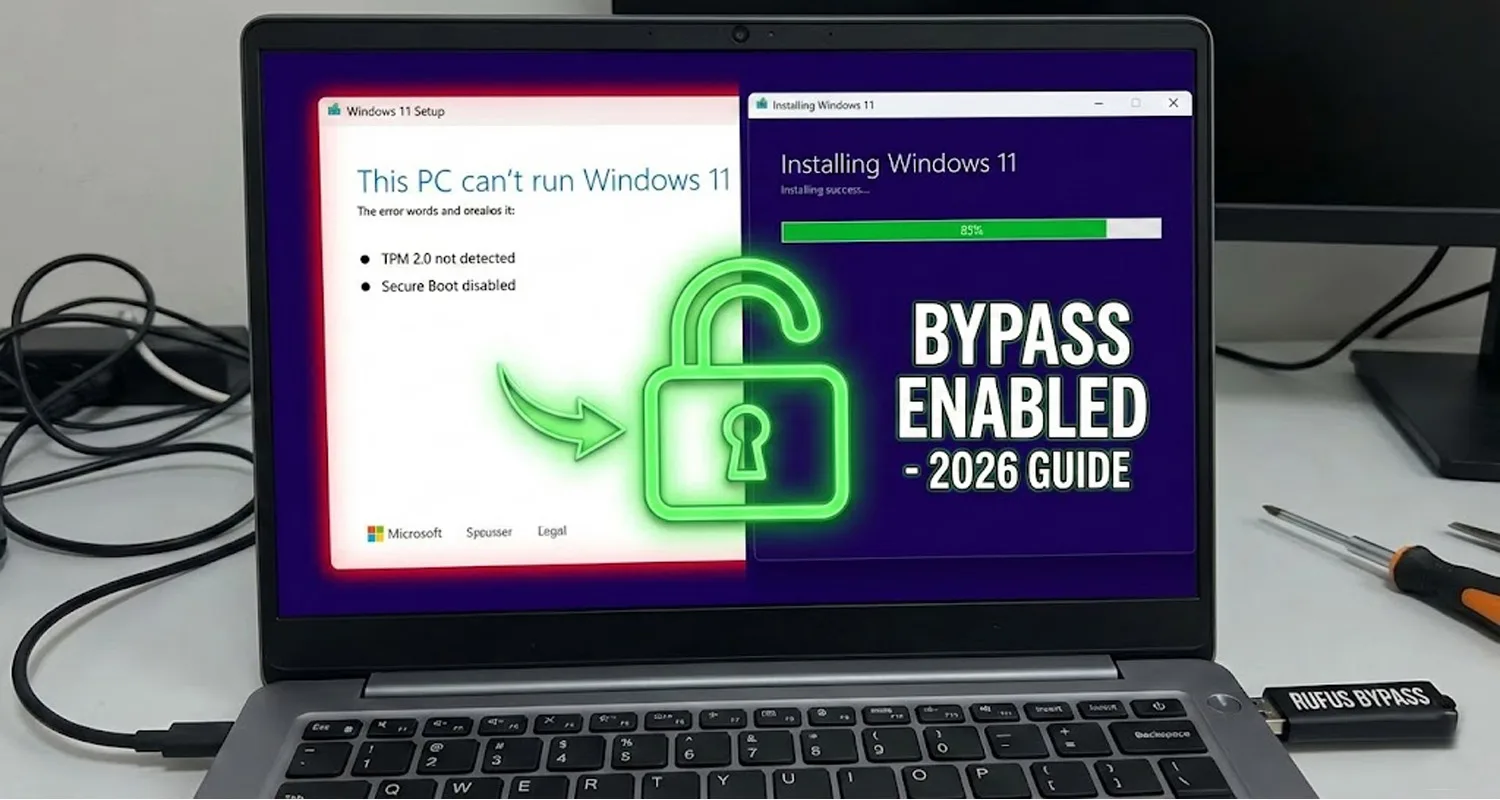
If you have tried to upgrade and were greeted with the dreaded message: “This PC doesn’t meet the minimum system requirements to run Windows 11,” usually citing missing TPM 2.0 or Secure Boot, this guide is exactly what you need.
You do not need to buy a new computer. You do not need to be a coding expert to edit Registry files manually. In this comprehensive guide, we will show you the safest, easiest, and most reliable method to install the latest version of Windows 11 on any unsupported laptop or desktop using a free tool called Rufus.
Let’s breathe new life into your old hardware.
Why Does This Error Happen?
Before we fix it, it helps to understand why Microsoft blocks the installation. Windows 11 introduced a requirement for a security chip called TPM 2.0 (Trusted Platform Module) and a feature called Secure Boot.
While these features enhance security, many powerful processors from Intel (7th Gen and older) and AMD (Ryzen 1000 series) were left off the “supported” list, even though they are more than fast enough to run the operating system smoothly.
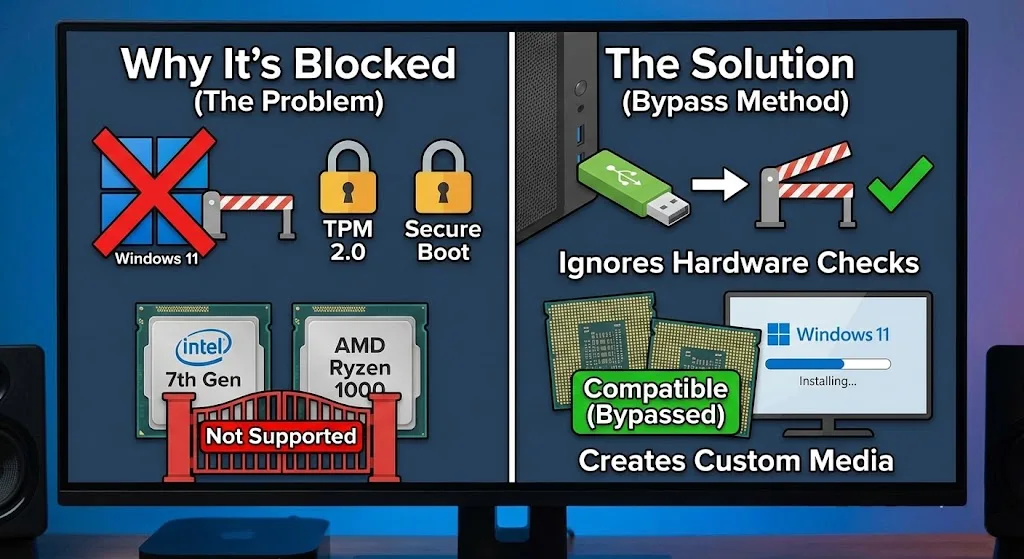
The method we are using today creates a custom installation media that tells the Windows installer to simply ignore these checks.
Prerequisites: What You Need
Before we start the “magic” process, make sure you have the following items ready:
1. A USB Flash Drive: You need a pen drive with at least 8GB of storage.
(Warning: The process will format this drive, so please back up any important data stored on it before proceeding.)
2. Windows 11 ISO File: You need the official disk image file. You can download this for free directly from the Microsoft website.
3. Rufus (The Magic Tool): This is a free, open-source utility that helps format and create bootable USB flash drives. It is the industry standard for this specific hack.
4. A Windows PC: To prepare the USB drive (can be the same PC you want to upgrade or a different one).
Step-by-Step Guide: Creating the Bypass Bootable Drive
Follow these steps carefully. This method works for clean installations (wiping the drive) and can also be used for upgrades (though a clean install is recommended for old hardware).
Step 1: Download the Necessary Files
First, Download the “Windows 11 Disk Image (ISO)” from the below provided link.
This simultaneous release strategy for the remaining platforms signals a massive shift in Square Enix’s business model, moving away from aggressive exclusivity to ensure their flagship titles reach the widest possible audience.
Download Windows 11 25H2
Next, search for “Rufus“ on Google, go to their official site, and download the latest portable version available in 2026.
Step 2: Launch Rufus and Select Your Drive
Plug your USB drive into the computer. Open the Rufus application (you might need to click ‘Yes’ on the User Account Control prompt).
- Device: Ensure your USB stick is selected in the dropdown menu.
- Boot Selection: Click the “SELECT” button on the right side. Browse your computer folders and select the Windows 11 ISO file you downloaded in Step 1.
Also read : Daemon Tools Ultra 2025 – Free Download
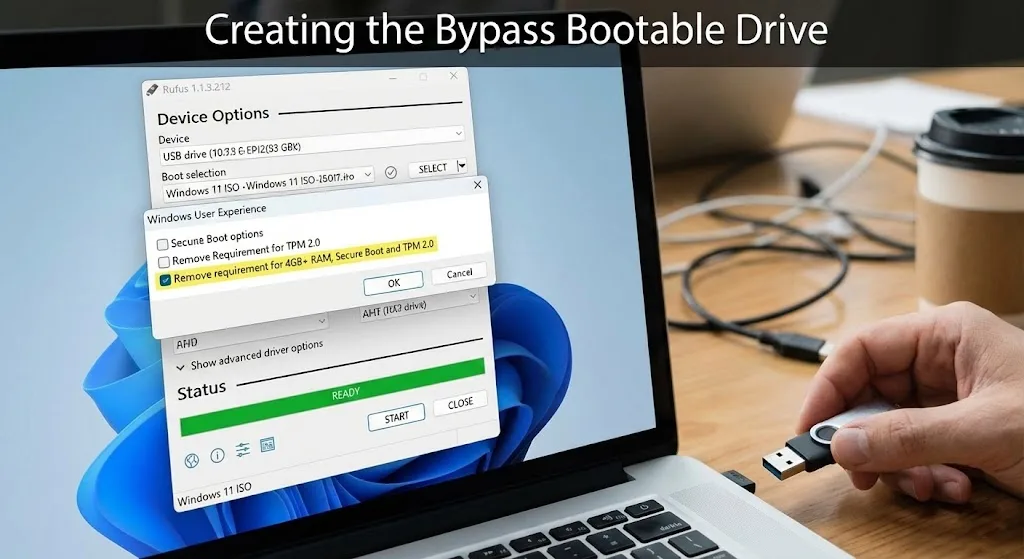
Step 3: The “Magic” Configuration
Once the ISO is loaded, Rufus will automatically detect the settings. Click the big “START” button at the bottom.
This is the most important part.
A dialog box titled “Windows User Experience” will pop up. This is where Rufus shines. You will see several checkboxes. You must check (tick) the following:
- ✅ Remove requirement for 4GB+ RAM, Secure Boot, and TPM 2.0: This is the core hack. It disables the hardware check that stops the installation.
- ✅ Remove requirement for an online Microsoft account: (Optional) Check this if you prefer to create a local user account (like “Admin”) instead of signing in with an email address during setup.
Once these are checked, click OK.
Step 4: Burn the ISO
Rufus will warn you that all data on the USB drive will be destroyed. Click OK to confirm. The process will take anywhere from 10 to 20 minutes depending on your USB drive’s speed. Wait until the green status bar says “READY.”
How to Install Windows 11 on Your PC
Now that your “Hacked USB” is ready, it’s time to install the OS.
- Restart Your PC: Keep the USB plugged in.
- Enter Boot Menu: As soon as your computer turns on, start pressing the Boot Menu Key. This key varies by brand:
- HP: F9 or Esc
- Dell: F12
- Lenovo: F12 or Fn+F12
- Asus: F8 or Esc
- Acer: F12
- Select USB: In the menu, use your arrow keys to select your USB drive (it might be labeled as “UEFI: SanDisk” or similar) and hit Enter.
- Run the Setup: The Windows logo will appear. Follow the on-screen instructions (Select Language > Install Now).
- Product Key: If you don’t have a key, click “I don’t have a product key.” (Windows will activate automatically later if your PC previously had a genuine Windows 10 license).
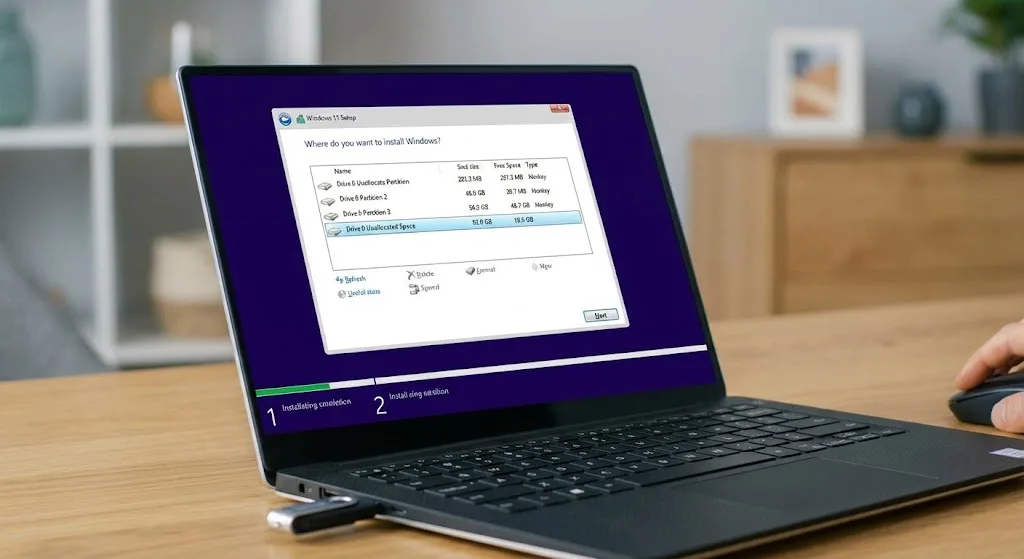
- Custom Install: Choose “Custom: Install Windows only (advanced).” Select your hard drive partition and click Next.
Note: Since we used the Rufus hack, the installer will NOT stop you to check for TPM or CPU. It will proceed exactly as if you had a brand-new computer.
Conclusion
Don’t let hardware restrictions hold you back from experiencing the modern design, improved window management, and gaming features of Windows 11. By using this Rufus method, you have successfully bypassed the TPM 2.0 and Secure Boot checks.
Enjoy your “new” PC! If you found this guide helpful, check out our Software section to download essential drivers and tools for your fresh Windows 11 installation.
(Disclaimer: While this method is widely used and safe, installing an OS on unsupported hardware is done at your own risk. Always backup your data before proceeding.)
Frequently Asked Questions (FAQ)
Will I get Windows Updates?
Generally, yes. Microsoft delivers security updates to unsupported PCs. However, for major annual feature updates (like 24H2 or 25H2), you might need to repeat this process manually rather than using the automatic Windows Update button.
Will it slow down my old PC?
Windows 11 is quite optimized. If your PC has an SSD (Solid State Drive) and at least 4GB of RAM, it should run just as smoothly as Windows 10. We highly recommend upgrading to an SSD if you are still using an old HDD.